

Nobody wants their beards to look messy, especially given how much effort it may take to grow one. Aim for an eye candy that works for your facial angles and has a well-defined shape and lines. Take control in your hands and learn how to properly trim a beard and give yourself that perfect look.
Preparing Your Beard for a Precise Trim
It’s not that you just plug in your trim and get it done. Without the right preparations, this endeavor’s results may be quite lacking. Here is how to maximize its efficiency in a few simple steps.
Wash and Dry to Remove Oils and Debris
Start by cleansing your face and beard. Excess oil, dead skin, and dirt buildup can drastically affect the accuracy and precision of your trimming movements. Otherwise, your trimmer blades can clog and lead to an unevenly defined beard at the end.
Comb Against the Grain to Expose Stray Hairs
That’s how you work on your line without missing any spots that require extra care and attention. It’s easier to assess whether there are stray strands or uneven lengths to handle.
Assess Length and Natural Growth Patterns
If you skip this stage, you may end up creating a lopsided and unrefined look instead of a well-trimmed beard. Understanding how your hair grows comes in handy to trim while aiming for symmetry and balance.
Assembling Your Trimming Toolkit
A reliable machine can help you master new skills and learn how to properly trim a beard faster. Here are some of the ingredients for an ideal trimming toolkit.
Choose a Quality Beard Trimmer and Guards
Braun All-in-One Men’s Shaving Kit Series 9 9440 , Heated Razor Deluxe Kit, and BaBylissPRO LIMITEDFX are excellent products to check and enjoy all-in-one efficiency on the go. Narrow down the palette of options by seeking top-tier features:
- a multi-directional pivoting head;
- hypoallergenic blades;
- different performance modes to handle various hair types and lengths;
- an ergonomic grip, etc.
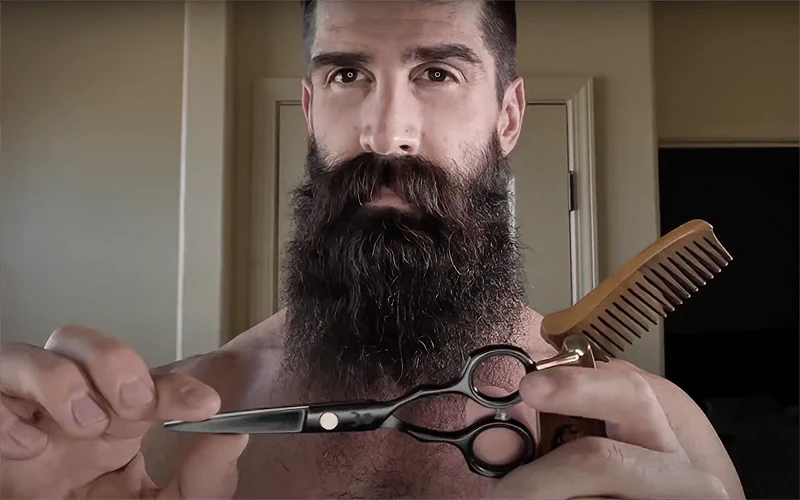
Include Scissors, a Comb, or a Brush for Precision Snips
Along with a mirror, these tools assist in tidying up your beard’s appearance. Even with advanced trimmers at your disposal, there are hard-to-reach spots that are easier to handle and detail with scissors and a brush.
Mapping Out Your Trim Plan
Whether you want to master how to properly trim a long beard or other lengths, it’s essential to examine your facial hair. Understanding its growth patterns will predetermine your trimming direction, letting you reduce the risk of redness, ingrown hair, bumps, and other issues.
Define Cheek and Jaw Lines First
They dictate the best silhouette for your beard, establishing its overall structure. This stage will lead to a more professional and tailored appearance.
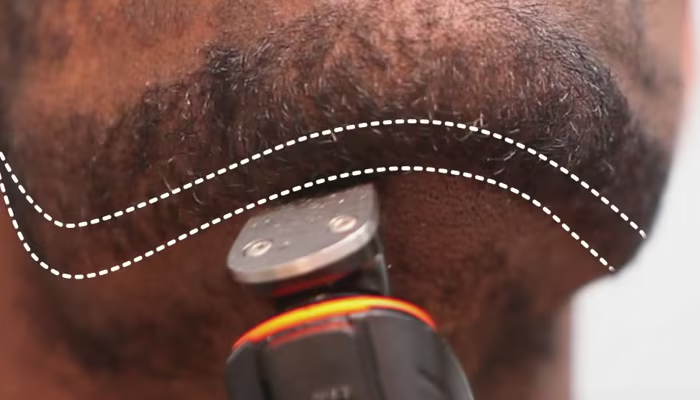
Establish the Ideal Neckline Above the Adam’s Apple
On the one hand, overlooking the importance of this step can lead to your neckline being too high and, therefore, unnatural. On the other hand, a poorly placed neckline is a highway to a bulky look. This sweet spot is a key to a well-groomed silhouette.
Select Overall Length Based on Style
The rule of thumb is simple: different lengths suit various face shapes, personal preferences, and grooming routines. Be picky when deciding on what works best for DIY trimming experiences at home – stubble, medium, or full-length beards. Defining your needs will ensure efficient and consistent results in the long run.
Core Trimming Steps
Get the silhouette you want and be confident in your looks by following a couple of straightforward beard-trimming guidelines. Mind the gap!
Step 1: Debulk with a Longer Guard, Trimming the Bulk of the Beard
Start by creating a more manageable foundation. If you don’t want to mess up with your “How to trim a long beard properly” self-education, take one step at a time. Don’t repeat this beginner-level mistake – avoid removing too much hair in detailed areas right away.
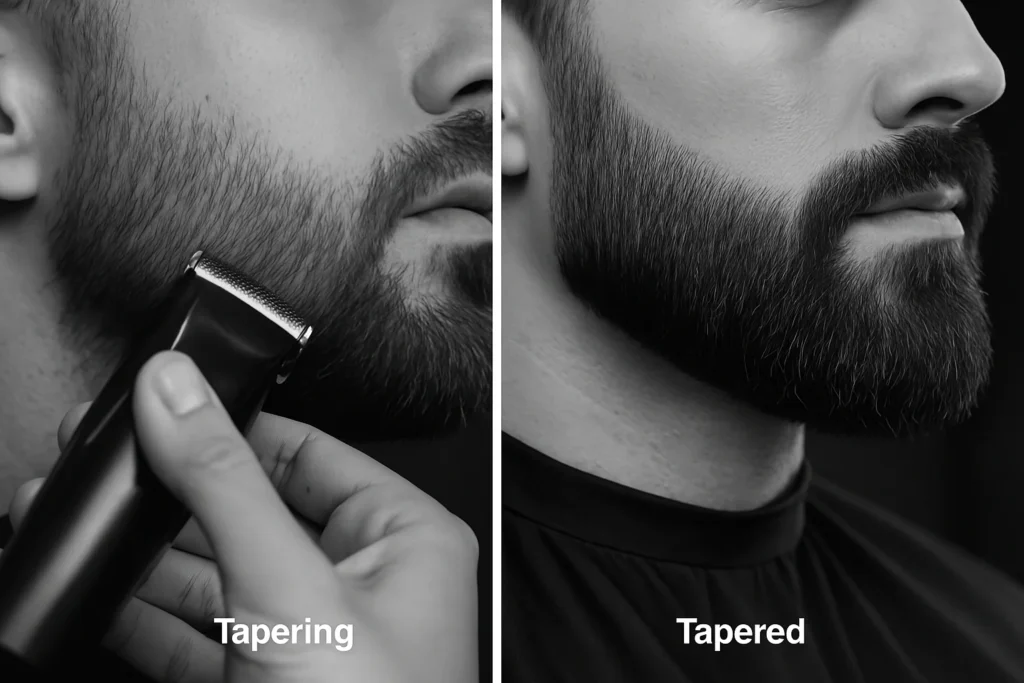
Step 2: Taper Sideburns and Blend Toward the Cheek Line
One of the benefits is that this tactic allows for a natural and seamless flow from your haircut to your beard. Be precise and careful to stay away from abrupt changes in length or harsh lines.
Step 3: Trim the Chin and Mustache Area with Descending Guards
This technique streamlines your experience, letting you minimize the risk of overcutting and achieve a gradual fade with better blending and balance. Don’t let your lack of skills to throw off your facial symmetry with over- or under-trimmed zones.
Step 4: Blend Guards for a Smooth Transition
If you skip this stage, you will have to witness how harsh lines contribute to choppy transitions between different hair zones on your face, creating an unforgettable look – poorly maintained, amateurish, and bulky. Pay extra attention to your ‘lining” around cheeks and jawline for a cohesive result.
Step 5: Free-Hand Shape with No Guard for Final Outline
Provide extra definition to your beard’s silhouette. That’s what distinguishes an amateurish look from a sharp and professional finish.
Detailing and Finishing Touches
How to properly trim a beard neckline never excludes this essential practice. Missing out on outward-growing or lightweight hairs can ruin the entire look. Pay attention to detail and ensure your beard’s symmetry is spot on.
Snip Stray Hairs with Scissors for Even Edges
If you don’t want your facial hair to look wild and untamed, work on how precise your trimming is. With scissors and other auxiliary products, you can perfect your beard’s shape and clean up flyaways.
Point-Cut the Bottom Edge for a Natural Look
Don’t underestimate how vivid even small imperfections can be. Thanks to the point-cutting technique, you can achieve a more natural silhouette and a softer look even at home.
Line Up Cheek, Jaw, and Neckline with Precision
In the best-case scenario, you opt for clean lines that establish an intentional contrast with your skin. Otherwise, you run the risk of making your face look soft without a strong and structured jawline.
Aftercare for a Healthy Beard
Guidelines on how to properly trim a full beard will be lacking without this special take on the post-trimming routine. It will help you evolve from a beginner to a pro in the field.
Rinse Away Loose Hairs and Product Residue
Even a quick rinse is better than nothing. It’s more advantageous than it might seem at first:
- unclogging pores and minimizing the risk of skin irritation;
- uncovering any missed spots to take care of and retouch;
- preventing redness and itchiness after the trimming session, etc.
Apply Beard Oil or Balm to Soothe Skin and Hydrate Hair
This technique is worth it, as it softens your hair texture and prevents the risk of post-trim inflammation and other possible issues. Don’t let brittle hairs settle and cause trouble – dry skin will only worsen the case.
Clean and Oil Your Tools to Maintain Performance
Using ineffective trimmers with blades that lost their sharpness long ago is a big no-no. For safe grooming, cleaning your tools is a must. Not only will it keep your results consistent, but it will also prolong the life span of your kit.
Scheduling Maintenance Trims
Unfortunately, finding the correct way to trim a beard and succeeding once won’t be enough. Your consistency matters a lot. Define your hair growth speed to promote your beard’s polished and professional appearance.
Trim Stubble Every 3-5 Days for Consistent Length
It is a good trick to keep control of your beard’s look. At the same time, aside from controlling the aesthetics of your facial silhouette, you also contribute to how your skin feels – reduced chances of irritation and itchiness.
Medium/Full Beards: Schedule Trims Every 7-10 Days
In this case, regular trimming is what you need to maintain the right symmetry and volume, especially controlling the way your beard looks on your cheeks and along the neckline. Don’t leave your beard unattended for too long. It may lose its original definition, and you will need to start all over again instead of going for finishing touches.
Adjust Frequency Based on Growth Rate and Style
Of course, it’s up to you to define your perfect beard trimming schedule. Focus on your style goals to align them with your self-care habits.
Troubleshooting Common At-Home Trim Issues
Over-trimming certain areas, trying to even them out, or over-defining your jawline are among the most typical problems you may create for yourself when trimming your beard. However, there is a way out for any misstep.
Fixing Uneven Patches on the Fly
It’s rare for beard growth to be a uniform process. When you look in the mirror, monitor such “imperfections” to smooth them out on time and restore the best balance of your beard.
Correcting a Too-High Neckline Without a Full Redo
Although mistakes are bound to happen in this trial-and-error course of DIY beard trimming, there are instances when simple tricks will do the right job:
- Let your neckline grow a bit more – wait for a few days before getting back control of your beard.
- Use a lower guard to soften the edge and a higher guard for tapering below the line.
- Now you are ready to redefine the way your jawline looks.
- Don’t forget about your post-trimming routine.
Soothing Razor Burn and Skin Irritation
Treat your skin immediately – rinse the hurt area with cold water to soothe and calm it. Avoid rubbing movements when using a towel for a while, so as not to worsen the state of skin irritation. Moisturizing balms and aftershaves will come in handy. However, say “no” to those containing alcohol and other “triggers.”
When to Seek Professional Help
Contact seasoned barbers for individual consultation on what trimming strategies will work the most for your hair type and growth rates. In addition, it’s a great way to fix any issues you encounter during your experiments at home.